Showing posts with label Monday Made It. Show all posts

Monday, July 14, 2014

Clipart has arrived!

I have been itching to say this... years, actually.  I have made my first clipart set.  

You don't know how excited I am for this.

I love to draw, color, doodle, etc.  I have an unhealthy obsession with fonts and clipart.  I have to redo things at school because I think they are ugly.  Yes, I said it... ugly.  But I've always wanted to do my own clipart.  And today, I have!

I've never taken any graphic design classes, or art classes, for that matter.  Everyone in my family is artsy... and I really thought that gene had passed me by.  Well, some may argue that it has, but I'm really enjoying this creative output.  So, I'm sharing with my wonderful followers my first attempt at clipart.  

I need a good name/brand for my clipart because I'm thinking about adding some to my store... any suggestions??


No credit is needed to use these, feel free to use in personal or TPT/TN items.  Right click and save as to have on your computer.   Let me know if you use them, or if you have any requests!

Monday, June 9, 2014

Monday Made it! AND Monday Meet Me

Oh, I've missed doing these!

I didn't get to do these last year, but did the summer before and they were so much fun!  Gave me another excuse to get a little messy and creative over the summer!

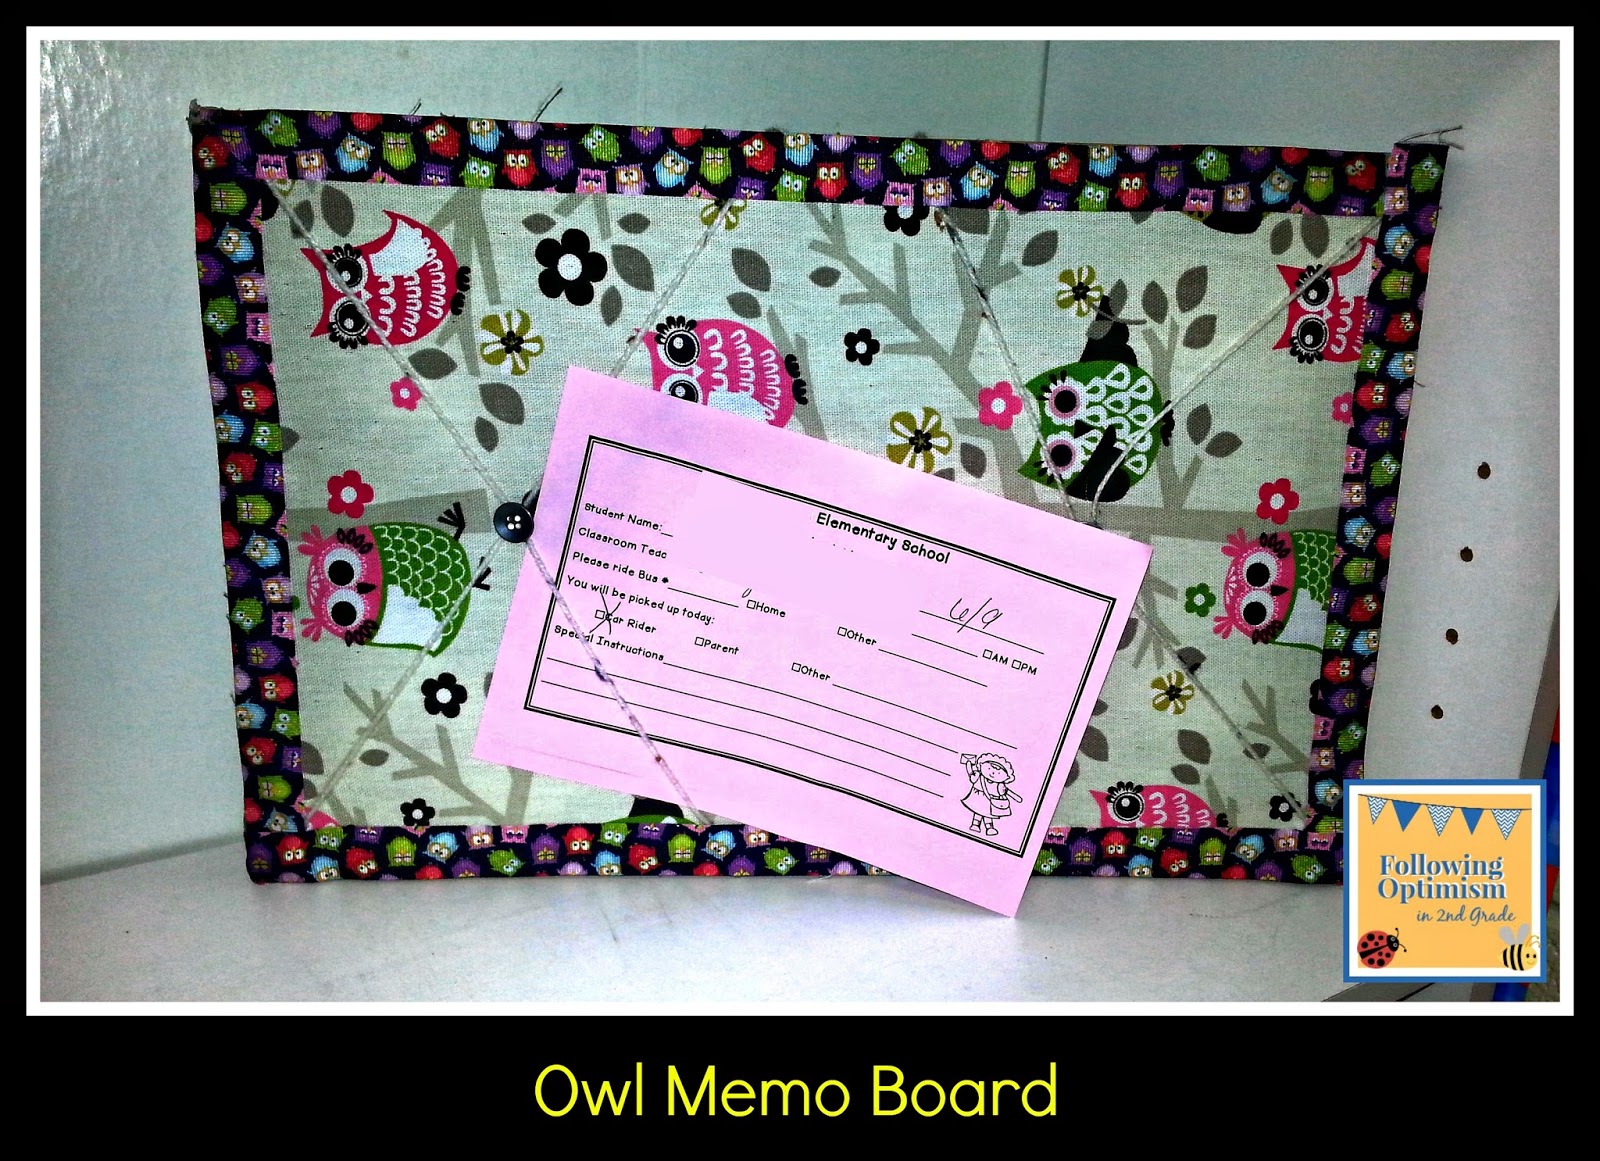
Well, I've not done anything too crafty because I'm still packing up my classroom.  But I thought I'd share with you a memo board that I made awhile back to help with bus notes for my kids...

I saw this pin on Pinterest....


and while I haven't gotten around to hanging it up, or even finding a good spot by the door, I'm still loving this!  The kids even put their notes on the board for me!  


I just took an old bulletin board (small), and covered it with owl fabric (of course!) and crisscrossed twine to make the holders.  I had some owl ribbon and hot glued around the edge.  I also put buttons where the twine crossed to make the twine stay tight.  It's sitting on my bookshelf by my door.  I'm trying to figure out a way to hang it vertically on the side of the bookshelf for next year.  I see some command hooks in my future.

What have you made?  Link up to Tara's weekly Monday Made its!


and for the 2nd link up...


Head over to the Teaching Tribune and link up to the week's link ups!


Follow my blog with Bloglovin

Monday, July 16, 2012

Monday Made it, Owls, and Manic Monday Freebie!!

Whew... giveaway is over and I can get back to normal blogging!


I have finally, finally finished my teacher toolbox!  I'm so excited and pleased with how it turned out.  A big thanks to my hubby for painting it for me!


Big thanks to Elizabeth for taking the time to make these printable labels!!  I used the font Fabulous Drew - not sure who made it, but I love it!  Click on the link to download the font!


I have also been an owl fanatic lately... looking for owls to decorate my classroom.  I found a lot of realllly, realllllly cute owl goodies at mardel.com.  I discovered Mardel on pinterest believe it or not... saw a really cute hanging organizer and followed the link back.  I like to order from them because they are a Christian company - sells homeschool, Christian Education, and classroom supplies.  (I am not receiving anything for sharing, I'm just stating my own humble opinion!)

Here's what I've ordered:  (my order got messed up, but their customer service is awesome!!)


They have a ton more owl goodies, but I had to show restraint...hubs...grr! :)

I can't wait for them to get here!  

Anyways, the other part of my Monday Made it is to go along with my new reading program.    My school/district is implementing IDR (Individual Daily Reading) which is an uninterrupted block of time, appropriate for each grade level and then working up to 30 minutes daily.  Reminds me of part of the Daily 5, where you work up your stamina, etc.  Well, at my overwhelming training session last week, one of our literacy coaches suggested getting the resuable grocery bags (one for each kid) and have them go shopping for books as part of their morning routine so when IDR came up, they would be ready to go.  I liked the idea...I like anything to do with shopping (hahahaha) so I'm getting some bags and I've been making these tags to go on them.  Yes, they are time consuming to make, but I've enjoyed making them.  Realistically....if my school year is going to be so crazy and so unrealistically overwhelming, I'm at least going to have a pretty classroom to go crazy in.

So here they are!!


Aren't they darling?  They have each student's number on them so I can reuse them next year.  I'm going to tie and then sew the knots securely on each bag.  I'm thinking about putting a command hook on the back of each kid's chair for them to hang the bags.  I don't know how that will work...too heavy, tip the chairs, break the hooks??  Going to have some experimentin' to do!!

Link up with Tara for Monday Made it!


My Freebie for Manic Monday has to do with Word Study or Word Journeys by Kathy Ganske.  At the beginning of the year, midyear, and end of the year, I use these forms to assess my students to find their instructional level for spelling.  If you've used Words Their Way, this is a slight adaptation from the program.  The sheets my literacy coaches made were nice, but they were not user friendly to check.  These are much easier for the teachers to use.  My grade level use them and like them, so I thought I'd share with you.  We found some from another district, I can't find them online to give them credit, but these are for all 4 stages (LN, WW, SA, DR) and has both form A and B (Form A is beginning and end of year assessing, Form B for midyear).  

Hope you can use them!!


Classroom Freebies Manic Monday

DSA form a and b

Monday, June 18, 2012

Monday Made It

This is my first attempt at doing a Monday Made It project.  I actually started it (and finished it!) last Wednesday night, the same day I went out and bought most of my materials.  Tara at 4th Grade Frolics made a set of these letters and I thought I'd give it a try!  


I made magnetic letters to hang on my rolling leveled library...not the greatest pic but it's all I had available to me now...it's ugly.  I should have brought it home and done an extreme makeover cart edition on it, but alas, it's still in my classroom...maybe I can sneak in and bring it home?  Need to figure out how to paint a metal cart...spray paint?
I digress...as usual :)

The wooden letters spell the word READ.  I'm going to have them on the side of my "bookcart" and have a cutsie clipboard hanging there so they can check out their books.  I'm really awful at keeping up with my books...to the point where I just say please only have 2 of mine at a time...riiiiiiiiight.  I think the record last year's class:  27 books in a desk.  We should have made a graph each time we cleaned out desks.

What you'll need:  
wooden or chipboard letters
paint
scrapbook paper (try to find paper, cardstock is a little too heavy)
foam brushes
Modge Podge
a good pair of scissors or Exacto knife
varnish or a gloss
strong magnets

I bought my letters and paper at AC Moore (hooray for a 15% teacher discount!! Michael's does that too!)  They actually had the pack of paper for $5 but it was on sale (cha-ching!) for $3 something then 15%...double cha-ching!  I was a little disappointed with the selection of paper in the packet...not at all what was on the front.  I guess they meant "assorted" from 6 designs...oh well, it was cheap!  See all those pretty pinks and turquoise colors?? (pout)


Pick your paper and turn it on the back.  Lay your letters down upside down (the right side laying against the paper) and trace each letter.  Cut them out and lay aside.  An exacto knife works really good on those inside pieces.


Begin to paint your letters.  I did put a layer of paint on the fronts of each letter just incase the paper didn't cover the wood.  It will all be covered later :)  Once dry, paint all sides.


Once you've painted and allowed time to dry (riiiiight, if you're as impatient as I!) put a thin layer of Modge Podge on the front of the letter and place the paper cutout on top, carefully, smooth out any wrinkles!


Almost done!  Here's each letter...


This is optional, depending on your likes...but I took my paint and with a foam brush, dabbed a little around each edge to make an antiqued look.  This would cover any areas that the paper may have missed, and I think it helps make it look a little nicer.


Apply a coat or two of varnish or gloss, and you're done!  I still have to get some magnets, but I'm not in a hurry yet :)


I think this will be really cute!  I can't wait to see how it looks!  I am a little disappointed with the colors...I was hoping for some brighter, but it's not so "girly" and maybe my boys will appreciate that :)  Let me know if you make these!!

Be sure to check out other Monday Made It ideas at Tara's linky!


Also, check out Kaitlyn's giveaway at Smiles and Sunshine!